Displaying content using Render nodes
Render* nodes can be used to display all kind of content: solid colors,
gradients, multimedia files, …
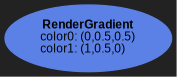
A simple horizontal gradient from teal to orange

import pynopegl as ngl


@ngl.scene()
def gradient(cfg: ngl.SceneCfg):
    return ngl.RenderGradient(
        color0=(0, 0.5, 0.5),
        color1=(1, 0.5, 0),
    )
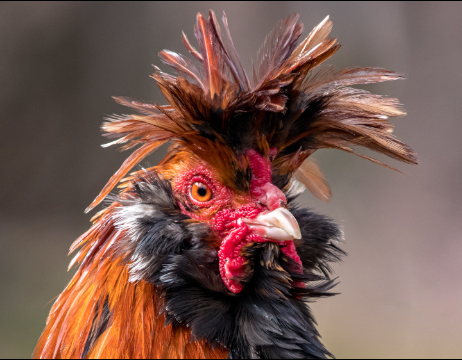
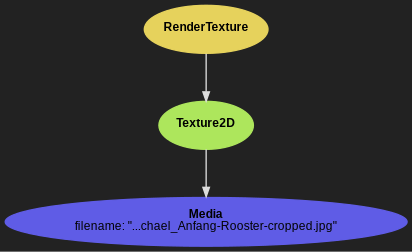
Render an image
from pynopegl_utils.misc import load_media

import pynopegl as ngl


@ngl.scene()
def image(cfg: ngl.SceneCfg):
    image = load_media(cfg, "rooster")  # Replace "rooster" with a path to your image

    cfg.aspect_ratio = image.width, image.height

    # Warning: the texture can be shared, but not the media
    media = ngl.Media(image.filename)
    tex = ngl.Texture2D(data_src=media)
    return ngl.RenderTexture(tex)
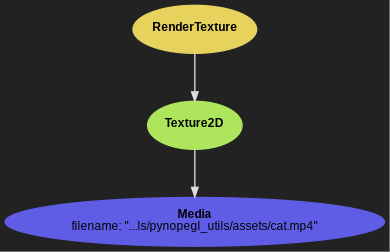
Render a video
from pynopegl_utils.misc import load_media

import pynopegl as ngl


@ngl.scene()
def video(cfg: ngl.SceneCfg):
    video = load_media(cfg, "cat")  # Replace "cat" with a path to your video

    cfg.aspect_ratio = video.width, video.height
    cfg.duration = max(video.duration, 5)  # Limit to 5 seconds maximum

    # Warning: the Texture can be shared, but not the Media
    media = ngl.Media(video.filename)
    tex = ngl.Texture2D(data_src=media)
    return ngl.RenderTexture(tex)
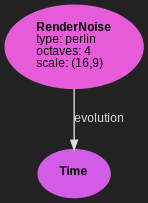
Render an animated fractal noise
import pynopegl as ngl


@ngl.scene()
def noise(cfg: ngl.SceneCfg):
    cfg.duration = 3
    return ngl.RenderNoise(type="perlin", octaves=4, scale=cfg.aspect_ratio, evolution=ngl.Time())
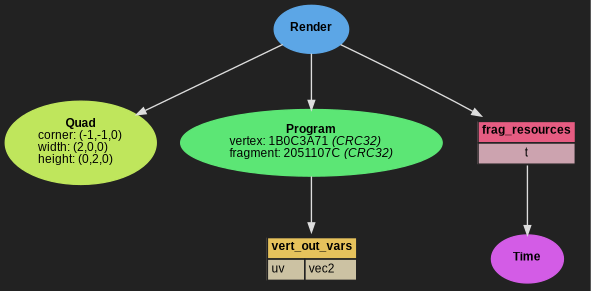
Render with custom shaders
It is also possible to create a custom shader using the Render node and get a similar experience to shadertoy.
In the following scene, even if the shaders are loaded from an external file
(for example with frag = open("/path/to/shader.frag").read(), the viewer
will automatically detect the open() and reload the preview when the file
is changed.
To do texture picking, add the Texture2D to the frag_resources, and use
ngl_texvideo() in the shader. See this shaders explanation section
for more information.
Custom shader development environment
from textwrap import dedent

import pynopegl as ngl


@ngl.scene()
def shadertoy(cfg: ngl.SceneCfg):
    cfg.duration = 5

    vert = dedent(
        """\
        void main()
        {
            ngl_out_pos = ngl_projection_matrix * ngl_modelview_matrix * vec4(ngl_position, 1.0);
            uv = ngl_uvcoord;
        }
        """
    )
    frag = dedent(
        """\
        void main()
        {
            vec3 col = 0.5 + 0.5 * cos(t + uv.xyx + vec3(0.0, 2.0, 4.0));
            ngl_out_color = vec4(col, 1.0);
        }
        """
    )

    quad = ngl.Quad((-1, -1, 0), (2, 0, 0), (0, 2, 0))  # Full-screen quad
    program = ngl.Program(vertex=vert, fragment=frag)
    program.update_vert_out_vars(uv=ngl.IOVec2())  # Specify the transfer of information between the 2 stages
    render = ngl.Render(quad, program)

    render.update_frag_resources(t=ngl.Time())
    return render